part 8: how to read a crochet pattern
Now you've learnt the basics of crochet, it's time to learn how to read patterns. They can seem a bit weird and code-y at first glance but here's a guide to cracking the code and making awesome projects!
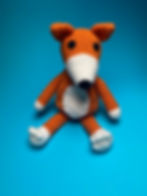
If you want to have a look at how a pattern is written, take a look at my Starburst Crochet Blanket Pattern.
This is a general guide to patterns, although you may find that different designers / magazines write in a slightly different way. This should give you a general guide to get you started. As ever, if you're struggling with a pattern feel free to email me.
-
Check if the pattern is written in UK or US. For some reason the terms are different with different abbreviations. Chain stitches (ch) and slip stitches (sl st) are the same but the larger ones are different.
-
Have a read through the notes and the pattern before you start. The designer will include little tips or notes that are important for completing the pattern.
%20Single%20c.png)
Before the pattern begins
TENSION
This is crazy important when you’re creating garments. Less so important when it’s a blanket or amigurumi. Not everyone will crochet stitches exactly the same tightness or looseness so by testing it out beforehand and changing your hook at the start you’ll save yourself a lot of tears. Who wants to spent weeks making a jumper only to find it doesn’t fit??
Example tension: 15sts x 8 rows = 10cm measured over tr using 4.5mm hook
To check the tension, you'll need some pins and a measuring tape/ruler.
Take the suggested hook and yarn (or nearest equivalent) and crochet a swatch larger than 10cm x 10cm, around 13cm x 13cm. Using pins, mark 10cm across the centre with pins.
Count the number of stitches between the pins horizontally, and count the rows vertically.
If you have the same number of stitches as suggested, crochet another swatch using a smaller hook. If the number of stitches and rows is more than suggested, crochet another swatch using a larger hook.
starting off
-
If the pattern starts with a slipknot it usually won’t say, it’ll usually just start with the number of chains, the abbreviation and the number you have to do (eg Ch40)
-
The other way of starting is with a magic ring (also called an adjustable loop or a magic circle), this is really common for amigurumi projects, the pattern should mention this at the start.
SIzing
If it’s a pattern with multiple sizes it will show the smallest first and then in brackets is it will show the other sizes.
Eg: 2, (4, 6, 8) years old
All the instructions in the pattern will then follow:
Eg, Ch 63 (68, 73, 78)
So for the 2 year old you would do 63 chains, 4 year old you would do 68 chains, etc.
getting used to the lingo
You'll find some of these terms in a pattern which will help you work through the design:
-
INC: Increase, add one or more stitches into the same stitch
-
DEC: Decrease, crocheting two stitches to become one (for more help go to part 6)
-
TURN: Turn your work at the end of each row
-
JOIN: Usually appears when you're working in the round, join at the end of each round with a slip stitch to the top of your starting stitch.
-
REP or RPT: Repeat
-
SK ST: Skip stitch, instead of working into the next stitch as usual, work into the one after.
-
CH-SP: Chain space. Like with granny squares, work into a space rather than into the stitch.
BRACKETS [] () AND asterisk ****
Often a instruction will repeat in the same row or row, so a pattern will include asterisks * and brackets (), [] to help you follow the pattern.
Eg, Rnd 2: sk st, *[3tr, 3ch, 3tr] into same st, sk st, sl st, rep from * 4 times. (50)
This means when you get to the asterisk, go back to the original one and then repeat this 4 times.
The instructions in the brackets usually mean those stitches need to be done together in the same stitch.
Counting stitches
The number at the end of the row (50 in the example), indicates the number of stitches you should have when you finish the row. It's useful to keep a count of these to check if you're following the pattern correctly.
It also may be written without brackets and instead written with sts at the end.
Eg, Rnd 2: sk st, *[3tr, 3ch, 3tr] into same st, sk st, sl st, rep from * 4 times. 50 sts.
If your pattern has a variety of sizes, it'll have the number of stitches for the smaller sizes first and then the next few sizes in brackets following it:
Eg, Rnd 2: sk st, *[3tr, 3ch, 3tr] into same st, sk st, sl st, rep from * 4 times. 50 (60, 70, 80) sts.
was this helpful?
Let me know if this was helpful to you to decode crochet patterns. If you need more help please feel free to get in contact.
Have a look at the shop to see if there's any patterns that take your fancy!